4/15/16

Mantelscape Design 101 ~ Creating a Vignette


One of the things I was thrilled about when Mr. Rosemary Lane built our custom mantel a few years back, was the fact that the depth of my mantel was now going to be a full 10 inches. More surface space to decorate...YES!!! It also meant that now I could create far more interesting mantescapes implementing a layering technique that so many designers use in decorating.


First like anything else in decorating, select a theme and a color scheme which will tie in with what you already have in your room. Then go around your home collecting like items in complimentary colors. Today I chose a garden theme for spring which is pretty neutral in color but is loaded with different textures. Items I corralled include plant pots, faux greens, a book on gardening, a few naturally textured orbs, wood candle holders and some empty picture frames I picked up at a thrift store a couple years ago. Place everything you have found on an empty surface like your coffee table, for easy access. 


Now clear your mantel of everything and you are ready to create.


Step One:
Decide on an anchor item for your mantel display. It could be a picture, mirror, platter, large vase of flowers, or what I decided to do was to place a boxwood wreath on the large mirror we already have hanging above the mantel.


Step Two:
Next find a couple items you can use to layer. I incorporated the two empty frames but you can also use  smaller framed pictures, a couple of vases that are like in color but not necessarily shape, books, plates...I think you get the picture. Now when placing items on the mantel you don't have to make it symmetrical, however both sides must strike some sort of balance. You may have noticed that I placed a book under the frame on the left. This adds visually both height and weight to that side of the vignette.


Step Three:
Place items in front of what you used in step two to create more or less a third row of your display. On the left side of the mantel I placed two candle holders, but instead of using candles I chose to add a little texture in the form of two spheres wrapped in a natural material. At the base of the larger holder I placed a small grapevine wreath to add not only contrast and more texture, but it also worked to raise the height of the picture frame just a little bit more.


On the right side are two cute flower pots I found on sale at Michael's and added some faux greens to them for texture. Then their height was varied using three books placed perpendicular to the mantel. I placed them perpendicular because I didn't necessarily want the books to stand out but just to add height to the right side of the display. 


Now even though different items were used on either side of the wreath, the display is balanced both height and weight wise. 


Step Four:
The final step is to add an item or two that departs from the rest of the display with regard to color and texture, but is still pertinent to the theme of the display. I chose a pretty mercury glass pear and placed it slightly off-center.


And for a touch of nostalgia, I decided to place on the right side of the vignette a little photo of my parents on their wedding day.


And my finished mantelscape...


If you notice the overall shape of the arrangement looks something like a triangle.


Placing items in a triangular configuration is a good rule of thumb to use when putting together a display which is centered to the mantel or any other flat surface.

Hope this little tutorial proves to be helpful to anyone who struggles with how to create an interesting and pulled together vignette.

Wishing you all a wonderfully beautiful spring weekend!

XO
Sharing this post at link parties hosted by these wonderful blogs...

4/13/16

Share Your Style Link Party #61


Welcome to Share Your Style! I'm Julie from Little Farmstead
and I'm your host this week. So glad you are joining us!


When you link to our party, your post will be seen on all five blogs below!


Recently on Little Farmstead, I've shared our new lab puppy, Ford...


And an easy "Farm" sign...


Now on to the party!

Thank you for the inspiration that you linked up with us last week. 

Here are some features that I really enjoyed...

Adirondack Girl At Heart  turned an old vintage frame into the cutest farmhouse chalkboard. (Love the added character and practicality of the chalk holder!)


Twelve on Main revealed her DIY Industrial Pipe Shelves. And wow. They look great!


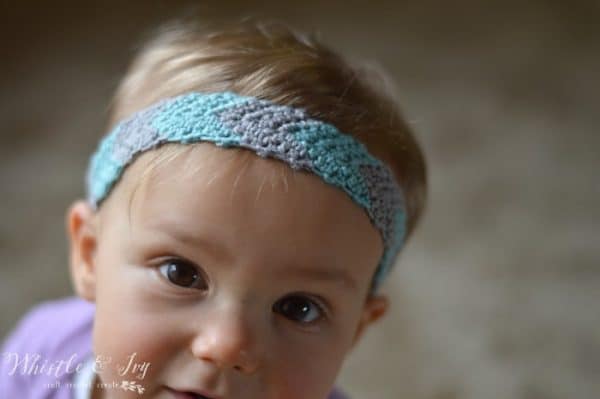
Whistle and Ivy provided a free crochet pattern for this simple (and adorable) chevron headband. What a sweet little one too (those eyes!).

Free Crochet Pattern - Simple Chevron Headband | Crochet this adorable headband. Includes instructions for women and toddler sizes. I am a huge fan of pesto. And asparagus. Pasta. And Chicken. So, you can see why this recipe from Good In The Simple got my vote!


If you have been featured please grab our cute little "Featured" button before you go.


And now it's your turn to share what you've been up to this week. Please remember to add a link to the Share Your Style party somewhere within your post.

Thank you and have a great day!


4/12/16

Blue & White on the Dining Room Table


I recently acquired my very first blue and white ginger jar from Home Goods and I have to say that it is soooooo pretty! I love blue and white together...to me it is the ultimate classic combination. And what better place to display my beautiful jar but on the dining room table. However one jar on this vast table wasn't going to work, so I shopped around my home for some complimentary pieces to create the table's vignette.


Silver is a beautiful accent metal to mix with blue and white. Using two silver candle sticks and hurricane globes, I flanked the center display. Then a pretty silver compote filled with faux pears was added to the vignette.


I also happened to have a large blue and white planter I bought years ago up in our attic, so down she came, was cleaned up and filled with faux hydrangeas and peonies. This arrangement anchors the entire vignette.


A couple of love birds sit on the right side of the large planter to balance out the ginger jar and compote on the left.


I also added a darling little milk glass vase to the display.


I think the green of the pears and hydrangeas really compliment blue and white as well as the silver pieces do. They also tie in to the green in our dining room's draperies.


I am going to be keeping my eyes peeled for more blue and white jars and vases to add to my newly started collection. How about you...what are your feelings about the combination of blue and white?

Wishing you all a great start to your week!

XO
Sharing this post at link parties hosted by these wonderful blogs...

4/6/16

Share Your Style Link Party #60


Hi all of you Share Your Style party goers, so happy you are back for another Wednesday evening full of inspiration and fun. This week your host is me, Lynn from the blog

Remember, there are 5 hostesses at this party so your link-up will get a lot of attention.


Now that Spring has Sprung (at least I think it has...temperatures here today are very cold!), we are seeing so much beauty in your gardens and make-overs to your homes .... just tons of inspiration, so without further ado, I would like to share some features from last week's party.............

Raquel of Organized Island shared the cutest Spring time brunch favor.....a dragonfly flitting on a flower napkin.  We have so many dragonflies in our gardens that I will definitely be making this one


Kathy of Petticoat Junktion explains the process of her make-over on this charming bench.  I just love the "SIT" on it.....don't you?


Lory of Designthusiam has beautifully decorated her mantel bringing the beauty and freshness of Spring beginnings from the outside to in


When you see lots of fresh asparagus at the market and the price has dropped, you definitely know Spring has arrived.  I love asparagus and definitely pinned this easy and fast recipe from the blog Moms Need to Know.


If you are featured this week, I hope you will grab this button and proudly display it on your blog.


Now let's get this party rollin'....................................


Disclaimer

All content provided on 21 Rosemary Lane blog is for informational purposes only. The owner of this blog makes no representations as to the accuracy or completeness of any information on this site or found by following any link on this site.

The owner of www.21rosemarylane.com will not be liable for any errors or omissions in this information nor for the availability of this information. The owner will not be liable for any losses, injuries, or damages from the display or use of this information.
These terms and conditions are subject to change at anytime with or without notice.

In addition products mentioned in some of my blog posts are done with the hope that i will render a good review on my blog. Products I review are ones that I have used personally and believe my readers will enjoy.
Copyright © 2014 21 Rosemary Lane. All rights reserved . Powered by Blogger.