2/17/13

Singing the Home Improvement Blues...

  ( kinda to the tune of Thorogood's Bad to the Bone)
 
I'm sittin' in my room,
 with color swatches all about...
Wish good old Ben Moore,
 would come help me out.
There are so many choices,
I ain't got a clue
 Ma thoughts are a fly'n...
It's the home improvement blues.
 
 Mr. RL is still work'n
 on his mantel so new.
How long this project gonna take? 
He ain't gotta clue.
He'd get it right
and then a snafu,
what will poor Mr. Rosemary Lane,
 finally do?
 
I'm sitting here singing,
the home improvement blues...


I've got inspiration
from magazines and the net...
Just hope my creativity
 won't drop me flet.
Swatches spread out
from here to there,
Fingers clasped on my head,
OMG is that my hair?

Oh...I've so got the home improvement blues.

 
I'm at my laptop singing,
 the home improvement blues.
 
You don't know how much
 I just want it to click,
to get it all done
without making ma self sick...

Pull yourself together girl,
cause you ain't alone...
you've got Mr. Rosemary Lane
and together you're
 Bad to the Bone!!!

B-B-B-B Bad

B-B-B-B Bad

B-B-B-B Bad

Bad to the Bone!!!!
 
THE END
(I feel better now)

Sharing at these super blog parties...
Savvy Southern Style


2/16/13

For the Love of Green and White~ Contemplating a New Look for Our Master Bedroom


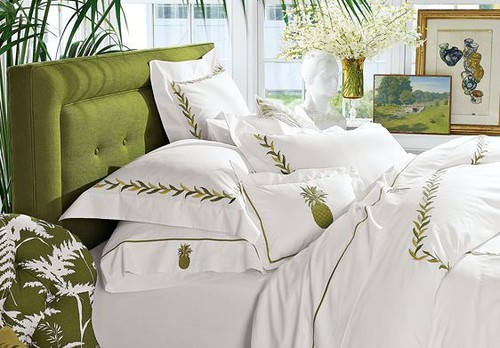
OK...every year I say this and it never happens...I really want to spruce up our master bedroom. The emphasis being on the word REALLY! I mean it...fresh paint, replacing our tired old curtains, and buying new bed linens! Over the years our bedroom has been a chameleon of colors, from apple green to romantic pink, to the current neutral color of a light beige. This color, quite frankly, has not only grown very old on me but also filthy dirty from our four legged friend el Busto! (He sleeps with his 4 giant paws on the wall!)
So yesterday I had a doctor's appointment, nothing serious just a routine blood pressure screen, and afterwards I decided to shoot on over to the nearby Home Goods store and check out their newly stocked spring merchandise. As I was milling around this enormous Home Goods (love it) I came upon this pretty green and white Laura Ashley quilt for only $39.99. What a steal for a queen sized bed!  Suddenly I became madly in love with the idea of our bedroom being drenched in tones of green with a background of bright white...now this became my new mission. I managed to pick up some 600 count sheets (yeah) and 3 coordinating bed pillows in both a soothing grassy green and crispy white.


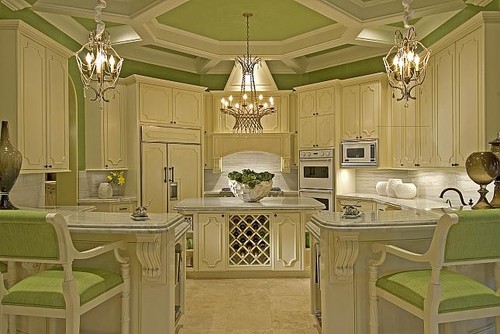
As result of yesterday's shopping spree, I ended up spending most of the morning today hunting for inspiration on the internet. Here are a few spaces I came across which totally inspire me.

Country living

Coastal Living

Dreamsline


House Beautiful

 To me green is classically fresh in addition to being able to produce a feeling of calm. Green, the color which represents nature best, is supposedly the most popular color in decorating. And did you know that green is the color which is the easiest for the human eye to see? It is also said that green can actually improve vision. While I am not sure if there is enough medical evidence to support that claim, I would buy into the fact that since it is the easiest color for your eye to focus on, the color green could have a role in reducing eye strain.


So as Mr. Rosemary Lane continues to plug along with his mantel project in the living room, I will be beginning the task of choosing a new color for our bedroom walls. I just can't wait to see how this room turns out!

Wishing you all a wonderful President's Day weekend!

XO
Sharing this post at these wonderful blog parties..

2/14/13

Creating A Header for Your Blog Using PicMonkey


I just finished creating my spring header and I got to thinking about the process I had to go through to get to the point of making my own headers. So I thought it would be a good idea to put it all down in a very detailed tutorial. I also hope that anyone who is in the throws of starting a blog, or even those of you who are like me and need everything broken down into tiny steps, that this post will help you create a professional looking header or banner for your web log. I have played around with just about every way possible over the past 2 years to make a blog header, but with the introduction to the partially free editing site PicMonkey, it is now easier than ever!
So without any further ado, here is how you need to begin.
 First off you need to determine the pixel size of your template. Since I blog using Blogger, I will be showing you how to find the pixel width in this format.  Go to your template screen in Blogger...see below.


Click on the orange  customize button. This is the next screen you will see.


Go to the left and you see where it says "Adjust Widths", you will want to click on that button. Finally you will be brought to this screen.


The top number is the actual size of your blog from the left to the right. So now you will need to determine how wide you want your header to be. Do you want it to go the entire width of your blog or centered smaller in the middle. My blog header is 1058 pixels wide which is 32 pixels in from each side of the blog's full width.

The rest of this tutorial is going to be presented in two parts.

Part One

Now that you have an idea of the size you want your header to be go to PicMonkey, a free editing site...this is what I used after they took my beloved Pinick away. :(  No really I do like this editing site and recently they have been adding more and more options.

Note: All of the editing tools here are free...no upgrades are needed to create your collage.


Click at the top where it says "Create a Collage" and this screen you see below will open.


Now this is where the creative fun begins.

(Update 2014 ~ If you have white in any part of your header it may appear to be gray once your image is uploaded to your website or blog. To remedy this issue, once you are in PicMonkey Collage go to the bottom icon, the one that looks like an artist pallet and click on it. You will see at the bottom there is a box next to the words "Transparent Background", click on that and the white background will dissapear. Now begin to create your header as directed in the tutorial. Also now PicMonkey has added the ability to go right into editing from the collage mode so you no longer need to open another window.Once your final editing is done you will save your image, just be aware that the image will be saved as a png. image rather than a jpg. image but that should not be an issue for you. Using the transparent option should eliminate that gray look to the image.) 

On the left you will see where you are able to upload your images. You can easily get pictures from your computer by using the browser. (I am just using PicMonkey's sample images to create this header.) Select what you like and when you are done uploading your pics you can now select what layout you would like to use to create your header. Do this by clicking on the second icon down on the left.


I decided to select L-egant and modify it to my needs. I wanted to show pictures and have the title of my blog all in one image.


I began by removing the cells I was not going to use. To do this, hover your cursor over the top right of the cell and an "x" will appear with the words "Remove cell".


 Click on it and the cell will disappear.


Continue until you have the look desired for your header. Here I removed the four small cells to the right of the large cell, then grabbing the lower boarder of the entire layout with my cursor, I was able to compress the layout into a rectangular shape. (You can expand or compress any cell by grabbing a side and manipulating the cell to the size you want.)


Pictures can be added to a cell by grabbing an image with your cursor and dragging it over to drop into the desired cell.


 If you want to create a new cell just take an image and hover it between two existing cells until you see a gray line appear, then drop the image and it will automatically fall into a new cell.


Once you have your pictures in place, you can go to the swatch icon on the left of your screen and select one of PicMonkey's swatches.


Click on the pattern you want, and like you did with the pictures, grab it with your cursor and drop in place. (You can create your own swatch as well, but that will have to be saved for another tutorial.)


You can also adjust the spacing between all of your photos by clicking on the background icon...the one with looks like an artist pallet.


Adjust the spacing by sliding the the button left or right.


The last thing you want to do before you are finished working on your collage layout is to take note of the numbers directly below your picture.


This is the pixel size of your picture. Remember I want my image to be 1058 pixels wide so I need to adjust the size here. You can adjust the size in the next step too, but adjusting it in this step will assure clarity of your picture. Again just like adjusting the cell size, the width can be changed by grabbing a side of the image with your cursor pulling it to the right or left until you reach the desired size. The height of your image can also be adjusted by grabbing the top or bottom and pulling the image up or down. Just be aware that changing the width and height of your picture will also alter the size of your picture cells, so you most likely will have to go back and readjust them.

Save your image by clicking on the "Save" button at the top of the PicMonkey screen.


Part Two

Now open up PicMonkey again using a new tab. This time you will click on where it says "Edit a Photo".

Note: Here you only need to upgrade PicMonkey if you want access to specific fonts, labels, and other embellishments. Basic editing can be done at no cost.


Your browser will open and select the image you've just created.


To add your title click on the "P" icon to open up the box you will type in.


Type your title in the box and then you can play around with font, color and sizing.


Once you have added all the embellishments you want, again hit the save button at the top of the screen and save your image to your computer.


And here is your completed image ready for installation on your blog.


 To install your new header in blogger all you need to do is go to your layout page and click on "Select a Gadget".


Click on "image" and to upload your header.


When your browser opens, make sure to un-click the "Shrink it to fit" box.


Upload your image and hit the save button in the lower left corner.

Next move your image to the box which says header.


 And don't forget to save your arrangement. Now it's time to take a look at your new header.


Just Gorgeous!!!
This is just your basics for using the PicMonkey editing site, but from here you can experiment and get really creative with your headers. I truly hope this tutorial proved to be of some help for you. With all the technology out there which seems to change almost daily, sometimes it is nice to be led by the hand through a process like this one.

Come back to see my new spring header on February 18th!!!

Wishing you all the love of beautiful St. Valentine's day!!!

Sharing this post at link parties over at these fabu blogs...

Disclaimer

All content provided on 21 Rosemary Lane blog is for informational purposes only. The owner of this blog makes no representations as to the accuracy or completeness of any information on this site or found by following any link on this site.

The owner of www.21rosemarylane.com will not be liable for any errors or omissions in this information nor for the availability of this information. The owner will not be liable for any losses, injuries, or damages from the display or use of this information.
These terms and conditions are subject to change at anytime with or without notice.

In addition products mentioned in some of my blog posts are done with the hope that i will render a good review on my blog. Products I review are ones that I have used personally and believe my readers will enjoy.
Copyright © 2014 21 Rosemary Lane. All rights reserved . Powered by Blogger.