Showing posts with label Christmas ideas. Show all posts

12/6/15

Our 2015 Christmas Mantel


This year's Christmas mantel was inspired by the gorgeous arbor vitae of our next door neighbor's which happens to line the fence between our two yards. Last year she was kind enough to let me snip some for my dining room, this year I am going full hog on the living room mantel.

I started by filling two candle globes with springs of the luscious greens, and embellished some faux garland with more arbor vitae and a few large pine cones. 


Then added a little bling to them using some glass Christmas balls.


An acorn wreath I made last year was hung on the mirror. To see how I created this wreath just click here.


Mercury glass candle holders are centered in front of the mirror with my handsome little silver deer out in front.


Still plugging away on my Christmas decorating, just a few more rooms to go including my back porch. Since the weather has been amazingly mild, I thought I may want to do a something festive outside for some winter entertaining. 

If you are looking for more inspiration, please don't forget that this Monday, December 7th,  kicks of a week of 30 home tours put together by my friend Marty of the wonderful blog A Stroll Thru Life.


The lineup is as follows!

Monday - Dec 7th

A Stroll Thru Life - Marty - http://www.astrollthrulife.net  
Claire Brody Designs - Claire - http://clairebrodydesigns.com 
Hymns & Verses - Doreen - http://www.hymnsandverses.com  
Rain On A Tin Roof - Jenna - http://www.rainonatinroof.com  
Making Home Base - Chelsea - http://www.makinghomebase.com 
Snazzy Little Things - Jeanette - http://www.snazzylittlethings.com 

Tue - Dec 8th

Bliss @ Home - Kristen - http://www.bliss-athome.com  
Driven By Decor - Kris - http://www.drivenbydecor.com 
(new)    Refresh Restyle - Debbie - http://www.refreshrestyle.com 
Our Southern Home - Christy -http://www.oursouthernhomesc.com  
(new)  Far Above Rubies - Anits - http://http://www.anitafaraboverubies.com
Life on Virginia Street - Sarah - http://www.lifeonvirginiastreet.com  

Wed - Dec 9th

Burlap and Lace - Shannon - http://www.burlapandlaceblog.com 
Decor To Adore - Laura - http://www.decortoadore.net  
Thrifty and Chic - Alicia - http://www.thriftyandchic.com 
21 Rosemary Lane - Barbara - http://www.21rosemarylane.com 
Style Your Senses - Mallory - http://styleyoursenses.com  

Thurs - Dec 10th

Simple Stylings - Summer - http://www.simplestylings.com  
A Thoughtful Place - Courtney - http://www.athoughtfulplaceblog.com 
Tidbits & Twine - Kim - http://www.tidbitsandtwine.com 
Monica Wants It - Monica - http://www.monicawantsit.com  
(new)   Decorating Delirium - Jennifer - http://www.decoratingdelirium.com 
No Minimalist Here - Sherry - http://www.nominimalisthere.com  

Fri - Dec 11th

Life Love Larson - Andrea - http://www.lifelovelarson.com 
Remodelando La Casa - Christina - http://www.remodelandolacasa.com  
(new) It All Started With Paint - Linda - http://www.itallstartedwithpaint.com 
Dimples & Tangles - Jennifer - http://www.dimplesandtangles.com 
SG Style - Shavonda - http://www.sgstyleblog.com 

See you there!!!
Have a great weekend!

XO
Sharing this post at link parties hosted by these spectacular blogs...

12/10/14

Fun Holiday Idea ~ Christmas Tree Cupcakes


How adorable is this little forest of Christmas trees...that you can eat! When I saw this floating around on Facebook the other day I knew I just couldn't resist the idea of giving them a try! So I followed the link and it took me to a wonderful foodie site called Just a Taste. This is actually a lot less complicated than it may look and if yours truly can pull it off than you should have no problem in creating your own forest of pretty little Christmas trees!

All you need is this...

1 box of chocolate cake mix of your choosing
a box of sugar cones which usually come 12 to a box
2 containers of vanilla frosting or you can always make your own
yellow and blue food coloring
some pearl sprinkles

* You will also need a pastry bag or gun fitted with a star shape pastry tip. I used a pastry gun with a #18 Wilton tip.

Make the cake according to the box directions and then fill muffin pan prepared with cupcake liners. While cupcakes are baking take one of your jars of vanilla frosting and using the food color begin to make the frosting color for your tree. Then taking one of the sugar cones, spread on a thin layer of frosting and repeat for the remaining cones. Transfer the rest of the frosting to the pastry bag or gun.

Once the cuppycakes are all done baking let cool and if necessary cut the tops of the cakes to create a nice flat surface. Slather on some of the white vanilla frosting to create a base for the cone and then pop the cone on top.


Starting at the base of the cone, pipe the leaves onto the tree. Once done add the little pearl sprinkles and a dusting of powdered sugar.

And there you have your very Merry Christmas Tree Cupcakes! These can even double as a festive centerpiece. We have a few holiday events going on this coming weekend so I think I will be taking a forest or two as desserts. 

Also don't forget that the Open House blog hop hosted by Sherry Carroll of the blog 
No Minimalist Here begins today and will be featuring open house tours from some of your favorite bloggers.


Wednesday 

Thursday

Friday
All About Vignettes


 Here is wishing you a wonderful day!!!

XO
Sharing this post at link parties hosted by these wonderful blogs...

12/3/14

How to Make a Miniature Skis with Poles Ornament


Just before Thanksgiving I received in the mail the December issue of Country Living magazine. And while a little disappointed at how thin this issue was, I couldn't help but to fall in love with some of the crafts featured in the magazine. My favorite being these darling miniature skis made with craft sticks and toothpicks.


Materials needed...

craft sticks
craft paint in blue, black and white
toothpicks
size one snap fasteners
brown felt or some twine
hot glue
bakers twine
hot glue gun

These little skis and poles are super simple to make but I will share a few things I learned while in the process of working with the materials. First I bought craft paint and painted the craft sticks but then thought there must be a faster way to get this job done, so I invested in a can of spray paint. The only problem with using spray paint is that the sticks are so light the blast of air from the spray can blew my craft sticks all over and upside down. The other issue is that I used a gloss paint and as we all know shiny paint shows flaws and craft sticks are far from perfect. So it was back to the craft paint. 

For the ski poles I found that it was best to dry the painted poles while they are not lying on a paper surface. I grabbed a lime from the frig and literally used it as my drying rack. I painted the poles white and then stuck them into the lime. Once dried I cut a blunt end and then dipped that end into black craft paint and returned them to the lime to finish drying. Using size one snap fasteners I put a little hot glue on the sharp end of the toothpick and slid the snap on. The wrist straps were created using small strips of brown felt, cutting them down to about an inch or so and then the two ends were glued together to create a loop. (You can also use twine as directed by Country Living.) Once the loop was dry the end was dipped into a tad of hot glue and then stuck to the black end of the toothpick.


To assemble your little skis, criss-cross two craft sticks and glue together. Once dry flip them over and glue on a piece of baker's twine, about 2 inches long, on the top of each ski. Flip back over and glue one ski pole on the top of the top craft stick. Taking a second ski pole glue it on top of the first ski pole in a criss-cross fashion. Let dry completely and you have your ornament.


Hang them on your tree or use them as a vintage touch on your  Christmas gifts.


~~~~~~~~~~~~~~~~~~~~~~~~~~~~~~~~~~~~


 Also beginning next Wednesday December 10th, stop by and follow along with a Christmas Open House Blog Hop hosted by Sherry of the blog No Minimalist Here. Twelve of your favorite bloggers, including yours truly, will be sharing their home holiday decor. It should be an inspiration packed 3 days so put it down on your calendars and/or grab the button from my side bar, just remember the hop begins next week with these super bloggers!

Wednesday 


Thursday

Friday

Have a great day!!!
XO
Sharing this post at link parties hosted by these wonderful blogs...

12/12/13

2013 Christmas Mantel


As many of us bloggers do, every year I try to switch up our Christmas mantel. (God forbid I have the same mantelscape 2 years in a row!) So out came a few of my old special addition holiday magazines...I can't bare to toss them out...just to peruse once more through some of their beautifully decorated rooms. This year I found myself drawn to more earthy or woodsy Christmas images and thus was born our 2013 Christmas mantel.


How is your holiday decorating going?


XO 
Sharing this post over at these wonderful blog link parties...

11/28/12

Another Festive Topiary

 
Ok I will admit it...I am on a huge topiary kick this year, I just think there is something regal about them. I also really like to create decorations from simple items I find outside and around my home. A few days ago I made a floor topiary using a tomato cage, to place outside my front door. To see that post click here. Today I created this really simple tabletop topiary with some boxwood, a 97 cent galvanized bucket and spherical floral foam or oasis.
 
STEP ONE:  Cut a piece of the stiff dry floral foam the height of your container. Force the foam into the container. If you want, place a piece or two of floral tape over top of the foam to secure it in place.
 
 
STEP TWO: Find a straight twig and force it into the dry floral foam.
 
 
STEP THREE: Begin to add the sprigs of boxwood to your floral sphere. (Before using this foam soak it on water for about 5 minutes.) I put the sprigs in the sphere starting at 4 points opposite one another to ensure an even look to my topiary.


STEP FOUR: Spear cranberries with toothpicks and poke into the topiary sphere.
 
 
STEP FIVE: Push the boxwood sphere onto the end of the twig. Push until the sphere is halfway onto the twig. Then tie a piece of ribbon to the twig...
 
 
...and you have your finished topiary! I went ahead and made a second one for display in the....well you'll just have to stop back to find out where I decided to put these pretty little topiaries!!!
 
XO
If you like this post please vote for 21 Rosemary Lane by clicking
on the picket fence below.
 
 
Thank you!!!
Sharing this post at link parties over at these super blogs.
Stone Gable
From My Front Porch to Yours
Savvy Southern Style
Cedar Hill Ranch

11/27/12

Mantel Inspiration

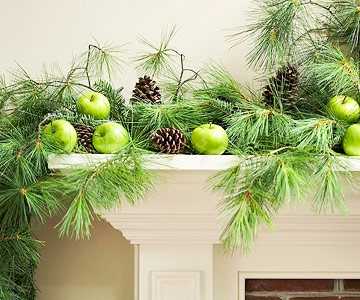
I like to switch my mantel display up with the seasons as well as changing how I decorate it from year to year for the holidays. So I went a huntin' for some cool ideas, wonderful inspiration, and guess what...I found some real beauties!

stone fireplace christmas mantel decorated with pine
via country living
christmas decorating fireplace
Christmas Mantel
Christmas Mantel

Christmas Mantel

Here is my mantel from 2010.


And from 2011...


Here is my sister Kim's mantel from last year.


Has anything inspired you???

I hope you are enjoying a fabulous day!!!

If you like this post please vote for 21 Rosemary lane by
clicking on the picket fence below.
Thank you!

Disclaimer

All content provided on 21 Rosemary Lane blog is for informational purposes only. The owner of this blog makes no representations as to the accuracy or completeness of any information on this site or found by following any link on this site.

The owner of www.21rosemarylane.com will not be liable for any errors or omissions in this information nor for the availability of this information. The owner will not be liable for any losses, injuries, or damages from the display or use of this information.
These terms and conditions are subject to change at anytime with or without notice.

In addition products mentioned in some of my blog posts are done with the hope that i will render a good review on my blog. Products I review are ones that I have used personally and believe my readers will enjoy.
Copyright © 2014 21 Rosemary Lane. All rights reserved . Powered by Blogger.