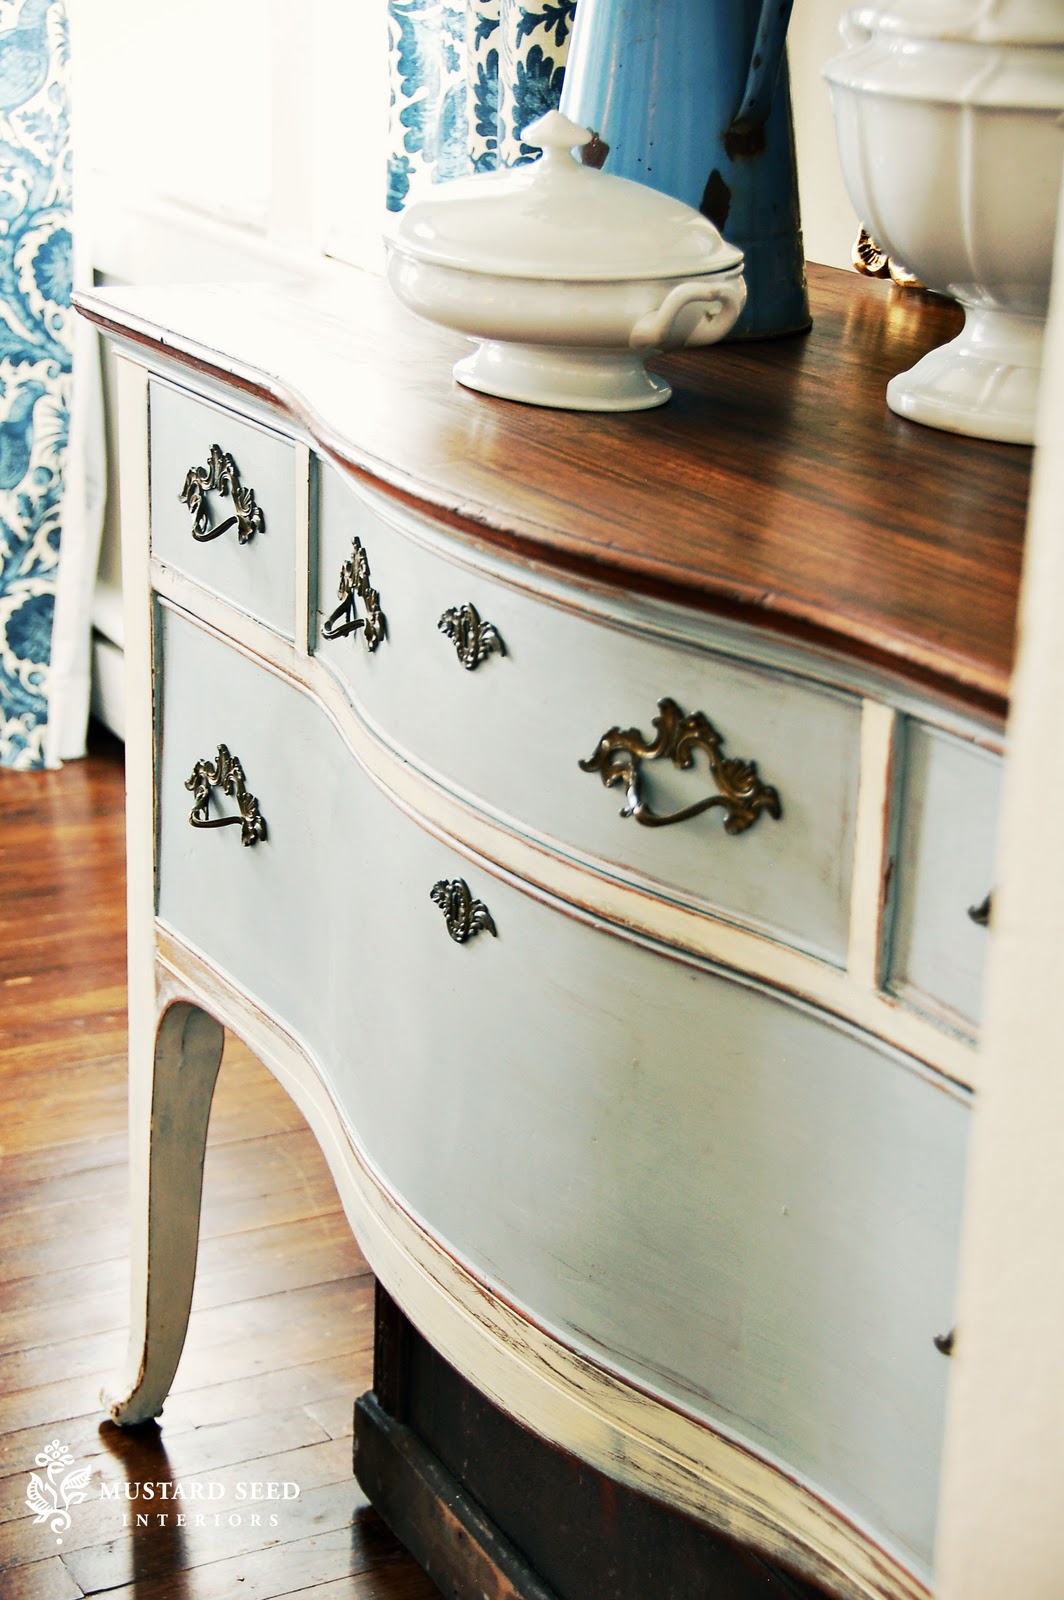
This is something I have been dying to try ever since I first heard of Chalk Paint for furniture. Chalk paint is designed to create a weathered or time worn finish. The big attraction to working with chalk paint is that there is no prep work involved. There is no need to sand or strip a piece of furniture to ensure that your paint will adhere. You can simply just paint over the existing finish and then once the paint is dry it is suppose to distress beautifully!
I have seen some gorgeous pieces on the Internet done with this medium and I have to say that I was very impressed!


Now you can purchase Annie Sloan chalk paint in one quart containers for about $35 before shipping and handling, and it does come in some wonderful colors. There are various places to buy this paint on the Internet, all you need to do is Google Annie Sloan.

Her color chart has about 30 different colors and many of these colors can be mixed with "Old White" to create even more options.

However, purchasing Annie Sloan paint is not in my thin dime budget due to the fact that it isn't very cost effective for me. So in lieu of buying this beautiful paint I have decided to make my own. I've found several tutorials on the Internet on how to mix and make the paint, but Sherri from No Minimalist Here has the best information on how to exactly do this. Her recipe is simply this...
2 parts paint to
+ 1 part calcium carbonate
Chalk Paint
Calcium corbowhat?..you may be asking. Calcium Carbonate or CaCO3.
According to Wikipedia, Calcium Carbonate is...
"in all parts of the world, and is the main component of shells of marine organisms, snails, coal balls, pearls, and eggshells. Calcium carbonate is the active ingredient in agricultural lime, and is usually the principal cause of hard water. It is commonly used medicinally as a calcium supplement or as an antacid, but excessive consumption can be hazardous.".
"in all parts of the world, and is the main component of shells of marine organisms, snails, coal balls, pearls, and eggshells. Calcium carbonate is the active ingredient in agricultural lime, and is usually the principal cause of hard water. It is commonly used medicinally as a calcium supplement or as an antacid, but excessive consumption can be hazardous.".
Calcium carbonate can be purchased in a powder form which is what you will need in order to combine it with your paint. I tried looking for it in various health food stores, home building stores, and a few garden centers but had no luck finding it. So I ended up purchasing CaCO3 from amazon.com at $8.26 per 12 oz. container.
Today I decided to mix my own chalk paint and apply it to one of the drawers of the desk I am currently working on. I used a clean dry pickle jar to mix my paint along with Sherri's simple formula. Immediately the paint became thick, but not too thick that I couldn't brush it on. The paint dried pretty quickly, in about 10 minutes.
From what I have read it is normal to have brush strokes visible on the first coat. I did apply a second and even a third coat and let them both dry completely. Once the paint was totally dry the brush strokes were no longer visible although you could tell that there was a texture to the paint. Now I have a lot of coverage but you can also do only one coat and allow more of the original color or stain to show through. I did lightly distressed the drawer front a little with a 100 grade sandpaper just to get an idea of how easy or difficult it is to remove some of the paint. It's pretty easy suffice to say. Also if you want more of a sheen on your piece and reduce the textured feel, you can buff it with a fine grade sandpaper to make the paint smoother and shinier.
I may go back and thin out my paint a little more before going on to the rest of the desk. I plan to do the desk two toned like the gorgeous buffet below done by Miss Mustard Seed. This is actually the inspiration piece for my project.

Also keep in mind that this stuff does tend to thicken up over time or when the lid is left off for too long leaving the paint exposed to the air. All you need to do in this case is to add a few drops of water to the paint and mix it well.
I think I am going to like this paint on my desk...can't wait to see how it turns out!
Update...I just used some of the original Annie Sloan Chalk Paint on an old chair I have and it took 3 coats of the ASCP to cover. The distressing was about the same. I did coat it with Minwax. Click here to see the chair.
Click here to see my homemade chalk paint on the desk I mentioned
If you like this post please vote for 21 Rosemary Lane
by clicking on the button below.
Thank you!
Linking up to these parties...


You go girl! I've been meaning to do this and like you I was going to mix my own. I evidently saw a different recipe and this one called for non-sanded grout. There is also sanded which I'm thinking would be smoother? Anyway, I haven't tried it yet but I like yours so if mine doesn't work out I know what to use the next time! LOL~ Thanks!
ReplyDeleteThank you! I was about to do some homework on chalk paint and you've done it for me!! I love the way your project looks with the chalkpaint on it. I'm already a follower....Thank goodness, or I might have missed this!
ReplyDeleteHi Barbara: I hate painting for the reasons you stated about prep. This sounds ideal. So far your drawer looks great. I can't wait to see the finished piece. You may have to become my mentor!..Happy Weekend..Judy
ReplyDeleteI've made my own using plaster app and had good luck with mine! Can't wait to see the whole desk.
ReplyDeletedeedee
As soon as I saw the food in your header I knew I had to follow...lol. What a great project this is. I've been wanting to try chalk paint for awhile now...great post. Following from the Social:)
ReplyDeleteI've been wanting to try this. That is a beautiful inspiration piece- looking forward to seeing your desk.
ReplyDeleteLove your inspiration piece! I'm completely with you that ASCP is way out of the budget for e, but I've been wanting to try it out! I'll have to give your recipe a try!
ReplyDeleteI'm following you back! Thanks so much for visiting my blog!
I have made some homemade chalk paint, but I used plaster of paris. It worked great, but I have read that the calcium carbonate was even better to use. Can't wait to see your finished piece.
ReplyDeleteThanks for this post Barbara!! I have two bureaus that I need to refinish for my daughter's room... I believe this method will save me a lot of sanding (time)!
ReplyDeleteThanks so much for sharing this at The DIY Dreamer... From Dream To Reality!
This is a great idea - I too have seen stuff on the internet and other blogs but just haven't found the time to try it. I just might have to find something to try this technique on. Thanks for sharing!
ReplyDeleteHugs -
Carol@arewethereyet
Hi Barbara, I am so glad you like the recipe for the DIY chalk paint. I am looking forward to seeing your finished project. Thanks for the mention!
ReplyDeletexo, Sherry
Like you, I've been wanting to try the chalk paint, but it's not in my budget. Thanks for sharing your recipe. Now maybe I can try it too!
ReplyDeleteWhat kind of paint do you use? latex? flat or semi-gloss?
ReplyDeleteI used latex paint and it really doesn't matter the sheen because once you mix in the calcium carbonate the finish is very dry...just like chalk. That is why you need to but wax finish on top if you like some type of sheen to your piece. Hope this helps!
DeleteYou can buy calcium carbonate from stained glass and pottery stores. Another name for it is whiting. I've heard you can get it at garden stores as a soil amendment but I haven't found it locally. It's also used in line spreaders for sports fields but again, I didn't find a local sporting goods store that carried it.
ReplyDeleteI was just about to post about this!! :-) I bought a 50lb bag of "Field Marking Chalk" (which is 100% crushed limestone, aka Calcium Carbonate) at my local True Value for $10-12 -- I don't think I'll EVER use that whole bag, unless I painted my house!!!! It was in the back, not out in the store, so be sure to ASK them for it.
DeleteHi i just looked on amazon for calcium carbonate is it the type you take by mouth?thanks
ReplyDeleteAll pics are very beautiful.. This is great ideas.. Thank you so much for posting this website.. Amazing work.. Love your inspiration piece.. What a paint do you use.. This project is very cool.. i found a lots of new things about that topic.. Thanks again.. Keep it up..
ReplyDeleteFor more information visit on this website
www.kitchenrespray.com